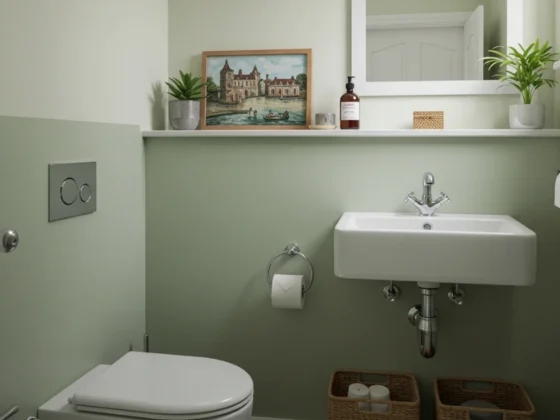
Starting your decorating project? Knowing about decorators caulk is key for a perfect finish. It’s a handy product for filling gaps and joints, making your space look great and last long. Decorators caulk works well with decorators cork for a top-notch look.
Decorators caulk makes your project look professional and polished. It’s important to know how to use it right for the best results. This article will show you how to use decorators caulk for a smooth, professional finish.
What Is Decorators Caulk and How Is It Used ?
Decorators caulk is key for a professional look in homes or offices. It’s a sealant made for looks, offering flexibility, durability, and easy use. It creates a lasting seal against mould and mildew, and comes in various colours and finishes.
The benefits of decorators caulk are many, and it’s used in different ways. Some main advantages include:
- Flexibility: It stretches and compresses without losing its seal, perfect for areas that move or vibrate.
- Durability: It withstands wear and tear, and extreme temperatures and weather.
- Ease of application: It’s simple to apply and works on wood, metal, and plastic.
Choosing the right decorators caulk ensures a professional finish that lasts. It’s a must-have for DIY fans and pros alike, thanks to its many benefits and uses.
In the UK, there are many decorators caulk types, each with unique features and uses. Knowing the benefits and uses of decorators caulk is crucial for a successful application.
| Type of Decorators Caulk | Characteristics | Applications |
| Acrylic Decorators Caulk | Flexible, water-based, easy to clean up | Wood, metal, plastic, and other surfaces |
| Silicone Decorators Caulk | Flexible, solvent-based, resistant to extreme temperatures | Areas prone to movement or vibration, such as windows and doors |
What You Need to Get the Job Done ?
To get a smooth, professional finish with decorators caulk, you need the right tools and materials. This includes a caulk gun, different nozzles, and a putty knife for smoothing. You’ll also need decorators cork materials for a durable seal.
A caulk remover might be needed for old or damaged caulk. And a damp cloth is key for cleaning spills. Having all these tools and materials ready makes the job easier and faster. You can find them at most hardware stores or home improvement centers in the UK.
Some important tools and materials to think about include:
- Caulk gun: This is the main tool for applying decorators caulk.
- Nozzles: They come in various sizes and shapes to control caulk flow.
- Putty knife: Used to smooth out caulk and remove excess.
- Caulk remover: For removing old or damaged caulk.
- Damp cloth: For cleaning up spills or messes.
With the right decorators caulk tools and cork materials, you can get a professional finish. And you’ll ensure a long-lasting seal. Always follow the manufacturer’s instructions for the tools and materials you use.
Preparing Your Work Area for Caulking
Before you start applying decorators caulk, make sure your work area is ready. Clean, dry, and dust-free surfaces are key. Also, check the temperature and humidity for the best caulk results.
For decorators caulk preparation, protect nearby areas with tape or film. This stops caulk spills and makes cleaning up easier. Here are important things to remember:
- Ensure the surface is clean and dry
- Remove any old caulk or debris
- Apply masking tape or a protective film to adjacent surfaces
By following these steps, you’ll get a smooth, professional finish. Always read the caulk’s instructions and take safety precautions for a successful job.
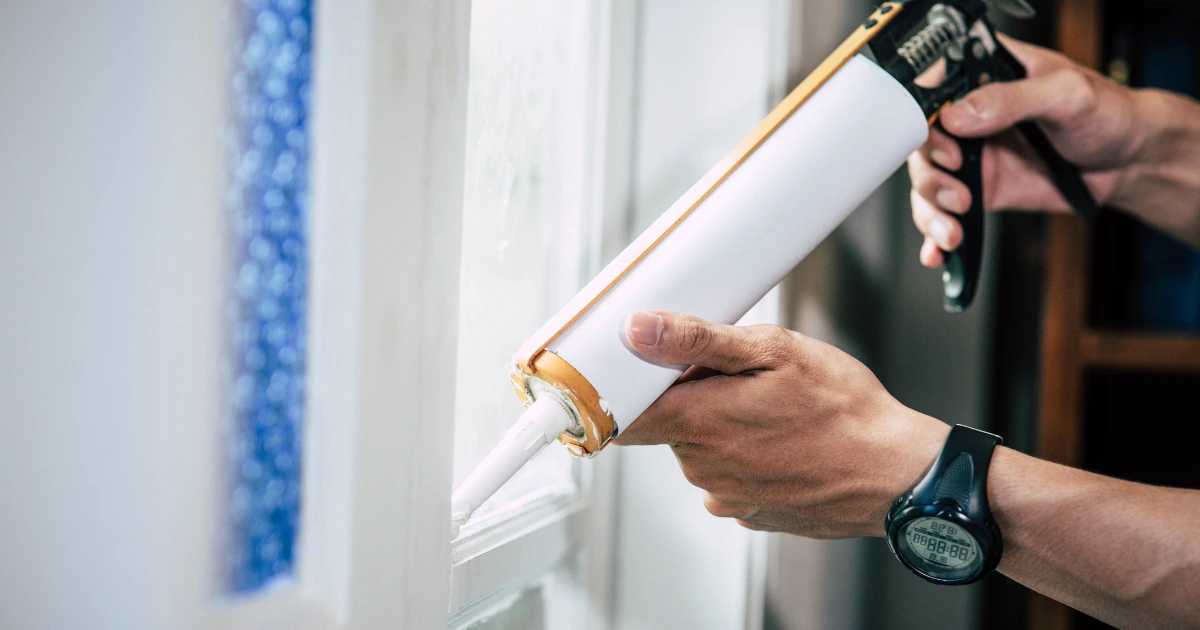
How to Load and Hold Your Caulking Gun ?
To get a smooth application, it’s key to know how to load and hold your caulk gun right. When loading a caulk gun, put the caulk cartridge in and pierce the seal at the top. This step needs care to avoid overloading, which can cause uneven application and waste.
When holding a caulk gun, keep it at a 45-degree angle. Make sure the nozzle is cut right for the caulk bead you want. This angle helps caulk flow evenly. Here are some tips to remember:
- Always cut the nozzle at an angle to prevent the caulk from coming out too quickly.
- Hold the gun steadily, with a firm grip to maintain control over the flow of caulk.
- Apply gentle and consistent pressure to the gun to achieve a smooth, even bead of caulk.
By following these tips and practicing, you’ll get good at loading a caulk gun and holding a caulk gun like a pro. This ensures a top-notch finish for your caulking projects.
Remember, the secret to a great caulking job is in the details. Mastering how to load and hold your caulk gun is a crucial part of the process.
| Step | Description |
| 1 | Insert the caulk cartridge into the gun |
| 2 | Pierce the seal at the top of the cartridge |
| 3 | Cut the nozzle to the correct size |
| 4 | Hold the gun at a 45-degree angle |
| 5 | Apply gentle and consistent pressure |
How to Apply Decorators Caulk the Right Way ?
Applying decorators caulk needs a bit of skill for a smooth finish. First, prepare your caulk nozzle by cutting it to the right size. This size affects the caulk bead’s thickness, so it’s crucial to get it right. A nozzle size of 1/4 inch or 1/2 inch works well for most applications.
Cutting the Nozzle Correctly
Cutting the nozzle at a 45-degree angle ensures a smooth caulk flow. The nozzle’s length also matters, as it controls how much caulk is dispensed. A longer nozzle means more caulk, while a shorter one means less.
Achieving the Perfect Angle
Finding the perfect angle is key for a good caulk application. Aim for an angle between 45 to 90 degrees, depending on the surface. Holding the gun at this angle helps apply caulk smoothly and evenly, avoiding air bubbles and unevenness.
Maintaining Consistent Pressure
Keeping the pressure on the caulk gun steady is vital. It prevents air bubbles and ensures consistent caulk flow. Apply gentle, steady pressure while moving the gun along the surface. This method helps create a smooth, even caulk bead for a professional finish.
| Nozzle Size | Caulk Bead Thickness |
| 1/4 inch | 1/8 inch |
| 1/2 inch | 1/4 inch |
Mastering Corner and Joint Applications
Applying decorators caulk to corner applications and joint applications needs more care than straight edges. It’s key to apply it smoothly and evenly. This ensures no air bubbles or gaps.
To ace corner applications, use a damp cloth to remove excess caulk. Then, smooth it out with a putty knife. This gives a seamless look. For joint applications, fill the joint fully but avoid overfilling to prevent a messy finish.
Here are some tips for corner applications and joint applications:
- Choose a high-quality caulk that meets your needs
- Ensure the surface is clean and dry before applying
- Apply the caulk in a steady, consistent motion
- Use a putty knife to smooth out the bead and remove excess
Remember, practice makes perfect. Don’t worry if it takes a few tries to get it right. With patience and effort, you’ll master corner applications and joint applications like a pro.
Common Mistakes to Avoid When Caulking
When you’re using decorators caulk, knowing common mistakes is key. The wrong nozzle size can cause uneven or too thick caulk. Make sure you pick the right nozzle for your job.
Surface preparation is also vital. If the surface isn’t clean, the caulk won’t stick well. This can make the caulk less durable and more prone to water damage.
Incorrect Nozzle Size Selection
Choosing the right nozzle size is essential for a good finish. A small nozzle can make the bead thin and uneven. A large nozzle can make it thick and messy. Always pick the right size for your job and make sure it fits your caulk gun.
Poor Surface Preparation Issues
Poor surface prep can cause many problems. Make sure the surface is clean, dry, and free of dust. This ensures a strong bond between the caulk and the surface, leading to a durable finish.
Application Speed Problems
Applying caulk too fast can introduce air bubbles and unevenness. Take your time and apply it steadily. This way, you’ll get a consistent and professional finish.
How to Get a Smooth, Professional Finish ?
To get a professional finish with decorators caulk, focus on the details. Use top-notch caulk and apply it in the best conditions. Smooth out the caulk bead and remove any extra caulk for a flawless finish.
Here are some decorators caulk tips for a pro finish:
- Read the caulk’s instructions carefully, as each type dries differently.
- Choose a caulk gun with a steady flow for even application.
- Apply caulk smoothly and steadily to avoid air pockets.
By following these tips and using quality caulk, you’ll get a professional finish that lasts. Always follow the manufacturer’s advice and take your time for a smooth finish.
With practice and patience, you can become skilled at applying decorators caulk. You’ll achieve a professional finish that boosts your surfaces’ look and durability.
| Tip | Description |
| Choose the right caulk | Select a high-quality caulk that is suitable for your specific needs and follows the manufacturer’s instructions. |
| Prepare the surface | Ensure the surface is clean, dry, and free of dust and debris before applying the caulk. |
| Apply the caulk smoothly | Use a steady, consistent motion to apply the caulk, avoiding air pockets and bubbles. |
Drying Times and Second Coats
Understanding drying times is key when using decorators caulk. The time it takes to dry can change based on the caulk type and the environment. Always follow the maker’s drying time guide for the best results.
Wait until the first coat is dry before adding a second one. Adding a second coat too early can ruin the finish. The drying times for decorators caulk can be anywhere from a few hours to days, depending on the product and conditions.
Understanding Curing Process
The curing process for decorators caulk involves chemical reactions that harden the caulk. This process is affected by temperature, humidity, and air flow. It’s important to create the best conditions for curing to get a strong bond.
When to Apply Second Coats
Before adding a second coat, make sure the first coat is dry and free of dust. You can test dryness by lightly touching the caulk. If it’s not sticky, it’s ready for more. Applying thin coats and letting each dry before adding the next helps achieve a smooth finish.
Here are some general guidelines for drying times and second coats:
- Check the manufacturer’s instructions for recommended drying times
- Apply second coats only when the first coat is fully dry
- Provide optimal conditions for the curing process, such as moderate temperature and humidity
By following these tips and understanding curing, you can get a professional finish with decorators caulk. Always follow the manufacturer’s instructions and take precautions for a strong bond.
| Decorator Caulk Type | Drying Time | Second Coat Application |
| Acrylic | 2-4 hours | Apply second coat after 4 hours |
| Silicone | 24 hours | Apply second coat after 24 hours |
Cleaning Up and Maintaining Your Tools
After finishing your caulking project, it’s key to clean up and keep your tools in top shape. This means cleaning up your caulk gun and other tools. It also involves proper tool storage to avoid damage and make them last longer.
To begin cleaning, use a damp cloth to wipe your caulk gun. This removes any leftover caulk. It also stops the caulk from drying out and sticking to the gun. Also, keep your caulk in a cool, dry spot to make it last longer and stay usable.
Proper Tool Storage
Storing your tools right is vital for their quality and life span. Store your caulk gun and tools in a special place, like a toolbox or container. This keeps them organized and safe from harm.
Extending Caulk Shelf Life
To keep your caulk fresh, store it in a sealed container. Keep it away from sunlight and moisture. These steps help keep your caulk from drying out and ready for your next project.
By focusing on cleaning up and tool storage, you keep your tools in great condition. Always follow the maker’s cleaning and storage tips for your tools. This way, you’ll get the best out of them.
Troubleshooting Common Caulking Problems
Dealing with caulking issues can be frustrating. It’s important to find out why the problem exists. This could be due to uneven caulk, air bubbles, or poor sticking. Understanding the root cause is key to solving it. You might need to check the instructions or ask a professional for help.
Some common caulking problems include:
- Choosing the wrong nozzle size
- Not preparing the surface well
- Applying caulk too fast
These issues can be prevented by using the right techniques and precautions. This ensures a smooth finish.
Remember, troubleshooting is a big part of fixing caulking problems. It saves time and stress. By quickly finding and fixing issues, you can get a top-quality finish and make your caulk last longer.
To solve caulking problems, you need the right attitude and approach. Be patient, keep trying, and learn from your mistakes. With the right methods and strategies, you can become good at caulking. This way, you can handle any problems that come up and get great results.
Conclusion: Mastering the Art of Decorators Caulk Application
Applying decorators caulk like a pro needs practice, patience, and detail. Follow the tips and guidelines in this article for a flawless finish. Always follow the manufacturer’s instructions and take your time. Remember, practice makes perfect.
With the right decorators caulk application techniques, you can seal joints and fill gaps. This will give your spaces a seamless, beautiful look that lasts. Embrace your DIY spirit, apply these tips, and be proud of your work. Your spaces will thank you for the effort.
FAQ
What is Decorators Caulk ?
Decorators caulk is a sealant for decorative use. It fills gaps and joints, offering a durable and attractive seal.
What are the Benefits of Using Decorators Caulk ?
Decorators caulk lasts long, resists mould and mildew, and comes in various colours and finishes. It’s also easy to apply and flexible.
What Tools and Materials are Needed for Applying Decorators Caulk ?
You’ll need a caulk gun, nozzles, a putty knife, and a damp cloth. A caulk remover might be needed for old or damaged caulk.
How Should I Prepare the Work Area for Caulking ?
Clean, dry surfaces are essential. Ensure the area is free from dust and old caulk. Protect nearby surfaces with tape or film.
How Do I Load and Hold the Caulking Gun Properly ?
Hold the gun at a 45-degree angle. Cut the nozzle to fit the bead size you want. Load the gun carefully to avoid waste.
What are the Proper Application Techniques for Decorators Caulk ?
Use the right nozzle size and angle for a smooth bead. Keep the gun pressure steady to avoid air bubbles.
How Do I Apply Decorators Caulk to Corners and Joints ?
For corners and joints, apply smoothly and evenly. Use a damp cloth and putty knife to achieve a professional look.
What Common Mistakes Should I Avoid When Caulking ?
Avoid wrong nozzle sizes, poor surface prep, and fast application. These can cause uneven or bubbly finishes.
What Tips Can I Use to Achieve a Professional Finish with Decorators Caulk ?
Use quality caulk and apply in good conditions. Smooth the bead and follow the manufacturer’s instructions for a professional finish.
How Long Does Decorators Caulk Take to Dry, and When Should I Apply Second Coats ?
Drying times vary by caulk type and conditions. Always follow the manufacturer’s drying times before applying second coats.
How Do I Clean Up and Maintain My Tools After Applying Decorators Caulk ?
Clean tools after each use to prevent damage. Store them properly and keep caulk in a cool, dry place to extend its life.
How Can I Troubleshoot Common Caulking Problems ?
Common issues include uneven beads and air bubbles. Check nozzle size, surface prep, and application speed. Consult the manufacturer or a professional for help.